Quick Answer
A print-ready file should match the printer's required page size, bleed, colour workflow, image resolution, font handling and PDF standard. For many commercial jobs, a properly exported PDF is preferred because it can preserve vector artwork, text and production information. Adobe's current print-production guidance recommends checking links, fonts, bleed, colour settings and preflight before exporting a print PDF, with PDF/X-4 among the supported professional workflows.
What Does “Print-Ready” Mean?
A print-ready file is not simply a high-resolution image saved as a PDF. It is a production file prepared for the actual printing and finishing process. The correct dimensions, colour handling, image quality, fonts, bleed and export settings all need to work together.
Requirements vary by printer and product. A business card, brochure, banner, packaging file and large wall graphic may use different dimensions, bleed values, resolution targets or PDF settings. The printer's specification should therefore be treated as the primary production reference.
Adobe's current InDesign documentation specifically recommends confirming links, fonts, bleed and margins, colour suitability and preflight before exporting a print PDF.
1. Start With the Correct PDF Workflow
PDF is widely used for commercial printing because it can retain vector artwork, page dimensions, text and other production information in one file. However, not every PDF is automatically print-ready.
Use the printer's requested PDF standard
If your printer specifies PDF/X-1a, PDF/X-4, Press Quality or a custom preset, use that specification rather than choosing a generic export setting.
Check the final page size
Confirm that the PDF page dimensions match the finished product or the scale requested by the printer. Do not rely only on the artwork appearing visually correct on screen.
Review marks and bleed
Include bleed and printer marks only according to the production workflow. Adobe's current InDesign guidance provides separate controls for Marks and Bleeds and the document's bleed settings.
Open and inspect the exported PDF
Check every page, image, font, transparency effect, overprint-sensitive element and trim area in the actual exported PDF.
Adobe currently recommends PDF/X-4 as an option for converting existing PDFs into a press-ready format in Acrobat Pro, although the correct standard remains dependent on the print workflow.
2. Set the Correct Document Size
Build the artwork at the final intended size whenever practical. If a job must be supplied at a scale—for example, a very large graphic—confirm the scale ratio with the printer before designing.
| Project | What to Confirm | Why It Matters |
|---|---|---|
| Business card | Finished size, bleed and safe area | Small trimming tolerances can affect text and borders. |
| Brochure | Flat size, folds, panels and bleed | Incorrect panel dimensions can affect folding and alignment. |
| Poster | Final size, orientation and viewing distance | Determines image resolution and typography scale. |
| Banner | Finished dimensions, hems, eyelets and finishing | Artwork may need extra safe zones or production allowances. |
| Wall graphic | Wall dimensions, installation seams and scale | Design needs to account for joins, obstacles and installation. |
3. Understand Bleed, Trim & Safe Area
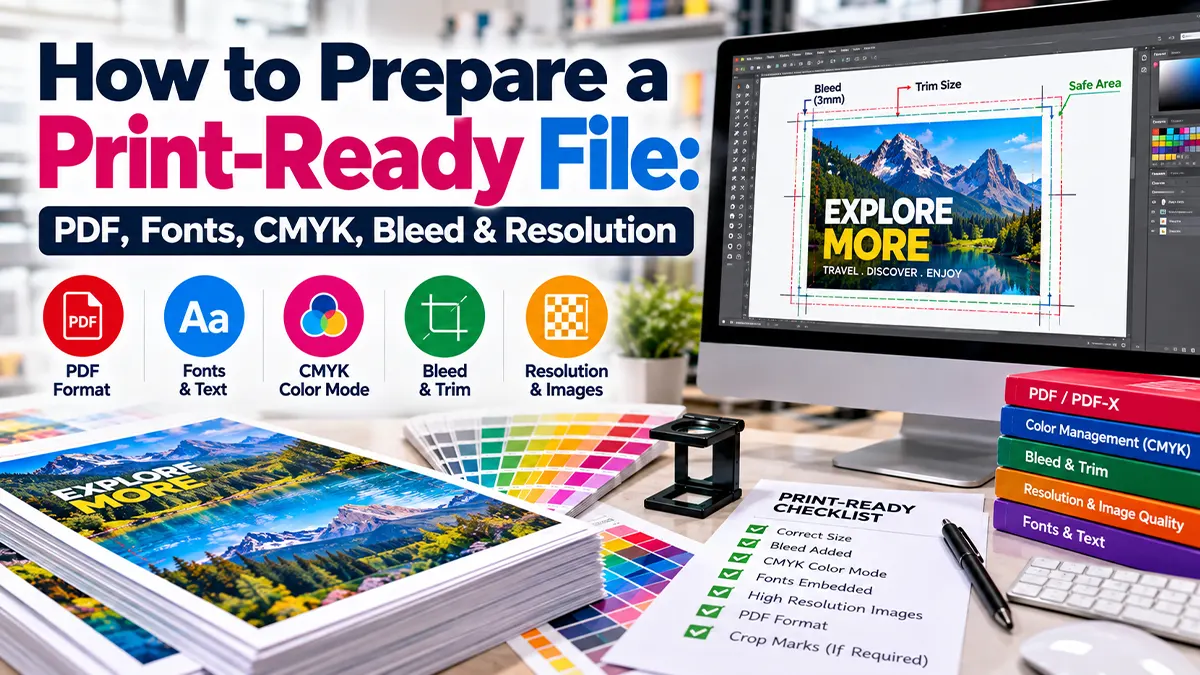
Trim is the intended final cut edge. Bleed is the artwork extending beyond that edge. A safe area keeps important text and logos away from the trim zone.
For many small-format print products, 3 mm bleed is a common starting point, but it is not a universal rule. The printer may require a different value depending on the product and finishing process. Adobe's current documentation describes bleed as artwork extending beyond the trim/crop boundary and provides dedicated bleed controls during PDF export.
Simple example
If the finished card is 90 × 55 mm and the printer requests 3 mm bleed on all sides, the artwork document may be set up at 96 × 61 mm, with the final 90 × 55 mm trim area clearly defined. Confirm the exact setup with the printer.
4. Handle Fonts Correctly
Font problems can cause unexpected substitutions, reflow or missing characters. Embedding fonts in a PDF helps preserve the intended appearance across systems. Adobe's PDF settings documentation includes controls for embedding all fonts, embedding OpenType fonts and subsetting embedded fonts.
- Use properly licensed fonts.
- Confirm that all required fonts are available before export.
- Prefer embedded fonts when the workflow supports them.
- Use outlines only when appropriate and after keeping an editable source file.
- Check special characters and multilingual text in the final PDF.
5. CMYK, RGB & ICC Colour Profiles
Colour preparation is one of the most misunderstood parts of print production. CMYK is common for physical printing, but there is no universal rule that every source image must be manually converted to CMYK before submission.
Adobe documents workflows in which RGB artwork is retained and converted through a managed prepress workflow, as well as workflows that convert to a specified CMYK destination. The correct approach depends on the printer's equipment, profile and prepress process.
| Colour Topic | Practical Guidance |
|---|---|
| RGB | Light-based colour space commonly used during image editing and digital display workflows. |
| CMYK | Ink-based colour model commonly used in physical print production. |
| ICC profile | Defines colour characteristics so colour can be managed between devices and workflows. |
| Printer profile | Use the profile supplied or specified by the print provider when required. |
| Proofing | Useful for important colour-critical work where appearance must be reviewed before production. |
6. Choose the Right Image Resolution
Image resolution should be considered at the final physical size, not just by looking at the pixel count. A small image enlarged dramatically may have insufficient effective resolution even if it looks acceptable on a screen.
Adobe notes that the appropriate image resolution depends on the output device and provides examples where image resolution can be lower than printer DPI. Its current InDesign guidance also uses low-resolution image warnings during preflight, including checks for images below 300 PPI.
| Print Type | Typical Starting Point | Important Note |
|---|---|---|
| Business cards / flyers | About 300 PPI at final size | Good general target for close-viewed raster images. |
| Posters | Often around 150–300 PPI | Depends on size and viewing distance. |
| Large-format graphics | May use lower effective PPI | Viewing distance and output process matter. |
| Logos / line art | Prefer vector artwork | Vector graphics scale without the same pixel-resolution limitation. |
7. Vector vs Raster Artwork
Vector artwork is defined mathematically and can generally be scaled without the same loss of sharpness associated with raster images. Logos, icons, simple illustrations and many text elements are often best supplied as vector artwork.
Raster images are pixel-based and are appropriate for photographs and complex continuous-tone images. Their effective resolution needs to be checked at the final output size.
Vector
Logos, icons, shapes, line illustrations and scalable typography. Common formats include PDF, AI and EPS depending on workflow.
Raster
Photographs, textures and pixel-based artwork. Common formats include TIFF, PSD and high-quality JPEG.
8. Check Links, Images & Transparency
Before exporting, verify that linked images are current and available. Missing or outdated links can produce incorrect artwork. Adobe's current InDesign guidance explicitly recommends checking the Links panel and updating modified links before PDF export.
- Update modified links.
- Replace missing images.
- Check image resolution at final size.
- Inspect transparency and blending effects.
- Check clipping masks and overprint-sensitive elements.
- Review small text placed over images.
9. Printer Marks: Crop, Registration & Colour Bars
Printer marks are production aids rather than decorative elements. Trim marks indicate the intended cutting area; registration marks help align colour separations; colour bars can support colour and ink-density checks.
Whether you should include these marks yourself depends on the printer's workflow. Adobe's documentation provides separate controls for trim marks, registration marks, colour bars and bleed.
10. Run a Preflight Check
Preflight is the final technical review before production. Adobe's current InDesign workflow recommends using the Preflight panel to identify issues such as missing fonts, low-resolution images and overset text.
Check dimensions
Confirm page size, orientation, number of pages and scale.
Check bleed
Make sure edge artwork extends into the required bleed area.
Check fonts
Confirm fonts are embedded or handled according to the production workflow.
Check images
Review resolution, links, cropping and colour profiles.
Check colour
Confirm the intended RGB/CMYK workflow and ICC profile.
Check the exported PDF
Open the final PDF rather than relying only on the editable design file.
Print-Ready File Checklist
| Check | Ready? |
|---|---|
| Correct final dimensions and orientation | ☐ |
| Correct bleed according to printer specification | ☐ |
| Important text and logos inside safe area | ☐ |
| Images high enough resolution for final output | ☐ |
| Fonts embedded or correctly outlined if required | ☐ |
| RGB/CMYK workflow confirmed with printer | ☐ |
| Required ICC profile applied or embedded | ☐ |
| Links updated and no missing assets | ☐ |
| PDF/X or other requested PDF standard used | ☐ |
| Preflight completed | ☐ |
| Final exported PDF visually inspected | ☐ |
Common Print-Ready File Mistakes
- Sending a screenshot or compressed web image instead of production artwork.
- Using the wrong finished size or page orientation.
- Forgetting bleed on artwork that reaches the edge.
- Using low-resolution images that were enlarged beyond their useful detail.
- Converting colours without knowing the printer's required profile.
- Missing fonts or unintended font substitution.
- Including crop marks when the printer's imposition workflow does not require them.
- Failing to inspect the exported PDF.
- Assuming every print job uses the same PDF preset.
Best Workflow for Sending Artwork to a Printer
- Ask for specifications: Get size, bleed, colour profile, PDF standard and finishing requirements.
- Prepare the document: Set dimensions, margins, bleed and safe areas.
- Prepare assets: Check fonts, images, links and vector graphics.
- Manage colour: Follow the printer's RGB/CMYK and ICC workflow.
- Export PDF: Use the requested print preset or PDF/X standard.
- Preflight and inspect: Check technical warnings and visually review the final PDF.
- Send the approved file: Avoid accidentally sending an earlier draft or web-optimised PDF.
Final Takeaway
Print-ready preparation is about predictability rather than one universal setting. The safest approach is to start with the printer's production specification, build the artwork to the correct dimensions, manage fonts and colour deliberately, use appropriate resolution and bleed, export the requested PDF standard and complete a final preflight check.
Adobe's current print-production documentation reinforces this workflow: verify links and fonts, confirm bleed and colour settings, run preflight and export using an appropriate print PDF preset.
Frequently Asked Questions
Disclaimer
Print specifications vary by printer, substrate, finishing method and production workflow. The guidance in this article is for general informational purposes. Always confirm final PDF, bleed, colour profile, resolution and font requirements with the print provider before production.
Need Help With a Print-Ready File?
Share your artwork requirements and print specifications to discuss file preparation, PDF setup and production-ready artwork.
Get a Consultation